Install and Run SQL Server Docker Container on Mac

Like most people, I use Mac , Windows as well Linux OS for development and testing purposes. Primarily I use Mac for Development purpose. I have few projects which uses SQL Server as Data Storage Layer. Setting up Docker Container on Mac and Opening up the ports was pretty easy and doesn’t take more than 10 Minutes.

Steps followed :
  • Install Docker
  • Pull SQL Server Docker Image
  • Run SQL Server Docker Image
  • Install mssql Client
  • Install Kitematic
  • Open the Ports to connect to SQL Server from the network
  • Setup port forwarding to enable access outside the network
Install Docker :

Get Docker dmg image and install. Just follow the prompts and its very straight forward. 
https://docs.docker.com/docker-for-mac/install/#download-docker-for-mac https://download.docker.com/mac/stable/Docker.dmg

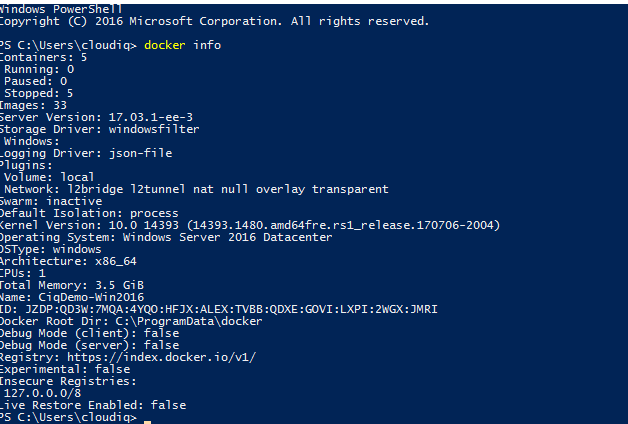
Once you have installed docker , you can verify the installation and version.

                bash-3.2$ docker -v
        Docker version 17.09.0-ce, build afdb6d4 
Pull SQL Server Docker Image ( DEV Version )
                docker pull microsoft/mssql-server-linux:2017-latest 
Create SQL Server Container from the Image and Expose it on port 1433 ( Default Port )
                docker run -d --name macsqlserver -e 'ACCEPT_EULA=Y' -e 'SA_PASSWORD=Passw1rd' -e 'MSSQL_PID=Developer' -p 1433:1433 microsoft/mssql-server-linux:2017-latest 

-d: this launches the container in daemon mode, so it runs in the background

–name name_your_container (macsqlserver): give your Docker container a friendly name, which is useful for stopping and starting containers from the Terminal.

-e ‘ACCEPT_EULA=Y: this sets an environment variable in the container named ACCEPT_EULAto the value Y. This is required to run SQL Server for Linux.

-e ‘SA_PASSWORD=Passw1rd’: this sets an environment variable for the sa database password. Set this to your own strong password. Also required.

-e ‘MSSQL_PID=Developer’: this sets an environment variable to instruct SQL Server to run as the Developer Edition.

-p 1433:1433: this maps the local port 1433 to the container’s port 1433. SQL Server, by default, listens for connections on TCP port 1433.

microsoft/mssql-server-linux: this final parameter tells Docker which image to use

Install SQL Client for MAC

If you don’t have npm installed in Mac, install homebrew and node.

                ruby -e "$(curl -fsSL https://raw.githubusercontent.com/Homebrew/install/master/install)"
        brew install node
        node -v
        npm -v 
                $ npm install -g sql-cli
         
        /usr/local/bin/mssql -> /usr/local/lib/node_modules/sql-cli/bin/mssql
        /usr/local/lib
        └── [email protected]
         
        $ npm i -g npm 
Connect to SQL Server Instance
                $ mssql -u sa -p Passw1rd
        Connecting to localhost...done
         
        sql-cli version 0.6.2
        Enter ".help" for usage hints.
        mssql> select * from sys.dm_exec_connections 
Get External Tools to Manage Docker

Kitematic

https://kitematic.com/

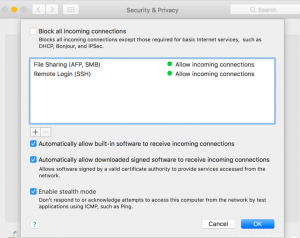
Open Up the Firewall to connect to SQL Server from outside the Host

Ensure your firewall is configured to allow the connections to the SQL Server. I turned of “Block all incoming connections” and enabled “Automatically allow downloaded signed software to receive incoming connections”. Without proper firewall configurations, you won’t be able to connect to the SQL Server outside the host.

Ensure Firewall allows the incoming connections to the Docker
Connecting from the Internet ( Port forwarding Setup )

Lets say you want to connect to the SQL Server you setup from outside the network or from anywhere via internet,you can setup port forwarding.

Get your public facing IP and setup the port forwarding for Port 1433 ( SQL Server port you have setup your docker container ). If its setup correctly , you should be able to telnet into that port to verify the connectivity.

        telnet 69.11.122.159 1433 

 Unless you absolutely require it , its very bad idea to expose the SQL Server to internet. It should be behind the network , only your webserver should be accessible via internet.

Troubleshooting :

While launching docker container , if you get the error saying that it doesn’t have enough memory to launch SQL Server Container, go ahead and modify the memory allocation for docker container.

  • This image requires Docker Engine 1.8+ in any of their supported platforms.
  • At least 3.25 GB of RAM. Make sure to assign enough memory to the Docker VM if you’re running on Docker for Mac or Windows.

I have setup this way.

Docker Memory configs

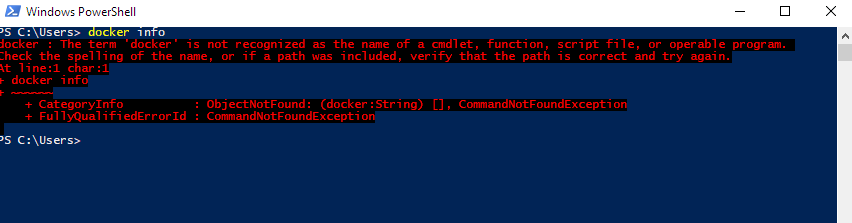
If you don’t provision enough memory, you will error like this.

Docker SQL Server Memory Error
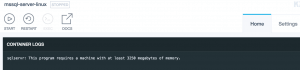
Look into Docker logs

Following command ( docker ps -a and docker logs mcsqlserver ) shows list of running processes and docker logs.

        $ docker ps -a
CONTAINER ID        IMAGE                                      COMMAND                  CREATED             STATUS              PORTS                    NAMES
9ea3a24563f9        microsoft/mssql-server-linux:2017-latest   "/bin/sh -c /opt/m..."   About an hour ago   Up About an hour    0.0.0.0:1433->1433/tcp   macsqlserver
$ docker logs macsqlserver
2017-10-08 23:06:52.29 Server      Setup step is copying system data file 
'C:\templatedata\master.mdf' to '/var/opt/mssql/data/master.mdf'.
2017-10-08 23:06:52.36 Server      Setup step is copying system data file 
'C:\templatedata\mastlog.ldf' to '/var/opt/mssql/data/mastlog.ldf'.
2017-10-08 23:06:52.36 Server      Setup step is copying system data file 
'C:\templatedata\model.mdf' to '/var/opt/mssql/data/model.mdf'.
2017-10-08 23:06:52.38 Server      Setup step is copying system data file 
'C:\templatedata\modellog.ldf' to '/var/opt/mssql/data/modellog.ldf'.
 
Security:

I highly recommend to create least privileged accounts and disable SA login. If you are exposing your SQL Server to internet, there are ton of hacking and pentest tools which uses sa login for brute force attack.

This is a continuation of the blog post that covers how to setup and run Image2Docker on local machines.

Local Machines
  • This mode looks for the IIS installed on the local machine and converts the IIS sites /virtual directories/ applications to docker files associate artifacts.
  • Run the following command
     
                    
                     ConvertTo-Dockerfile `
                     -Local `
                     -OutputPath {{OutputPath}} `
                     -Artifact IIS  `	
                     -Verbose 
  • Local parameter is used for iis discovery on local machines.
  • OutputPath parameter specifies the location to store the generated Dockerfile and associated artifacts.
  • Artifact parameter specifies what artifact to inspect. In our case this is IIS.
  • Verbose parameter is optional and it will give all the verbose logs.
  • Following is the sample command
     
                    
                    ConvertTo-Dockerfile -Local -OutputPath c:\docker_repo\iis -Artifact IIS -Verbose 

When it completes, the cmdlet generates a Dockerfile which turns that web server into a Docker image. The Dockerfile has instructions to install IIS and ASP.NET, copy in the website content, and create the sites in IIS.

Disk Images
  • After installing the Image2Docker PowerShell module, you will need one or more valid .vhdx or .wim files (the “source image”). To perform a scan of a valid VHDX or WIM image file, simply call the ConvertTo-Dockerfile command and specify the -ImagePath parameter, passing in the fully-qualified filesystem path to the source image.
  • Run the following command
     
                    
                     ConvertTo-Dockerfile `
                     -ImagePath {{ImagePath}} `
                     -OutputPath {{OutputPath}} `
                     -Artifact IIS  `	
                     -Verbose 
  • ImagePath parameter, specifying the location of the disk image. {{ImagePath}} -> Provide your valid .vhdx or .wim images path stored in the local machine. The disk image must be available locally.
  • OutputPath parameter specifies the location to store the generated Dockerfile and associated artifacts.
  • Artifact parameter specifies what artifact to inspect. In our case this is IIS.
  • Verbose parameter is optional and it will give all the verbose logs.
  • Following is the sample command
     
                    
                    ConvertTo-Dockerfile -ImagePath C:\vhds\qa-webserver-01.vhd -OutputPath 
                    c:\docker_repo\iis -Artifact IIS -Verbose 

The qa-webserver-01.vhd contains Two websites. One is AspNet MVC app and another one is the WEB API.

When the docker commandlet completes, the cmdlet generates a Dockerfile which turns that web server into a Docker image. The Dockerfile has instructions to install IIS and ASP.NET, copy in the website content, and create the sites in IIS.

The Image2Docker creates the website contents for ASPNET MVC app & WEB API and extract the dockerfile containing the websites configured on the image file.

Windows Containers do not ship with Active Directory support and due to their nature can’t (yet) act as a full-fledged domain joined objects, but a certain level of Active Directory functionality can be supported through the use of Globally Managed Service Accounts (GMSA).

Windows Containers cannot be domain-joined, they can also take advantage of Active Directory domain identities similar to when a device is realm-joined. With Windows Server 2012 R2 domain controllers, we introduced a new domain account called a group Managed Service Account (GMSA) which was designed to be shared by services.

https://blogs.technet.microsoft.com/askpfeplat/2012/12/16/windows-server-2012-group-managed-service-accounts/

https://technet.microsoft.com/en-us/library/hh831782(v=ws.11).aspx

We can authenticate to Active Directory resources from Windows container which is not part of your domain. For this to work certain prerequisites needs to be met.

For once your container hosts shall be part of Active Directory and you shall be able to utilize Group Managed Service Accounts.
https://technet.microsoft.com/en-us/library/hh831782%28v=ws.11%29.aspx?f=255&MSPPError=-2147217396

The following steps needed for communicate Windows container with on premise SQL server using GMSA.
Environments are used and described for this post.

  1. Active directory Domain Controller installed on server CloudIQDC1.
    • OS – Windows Server 2012/2016.
    • The domain name is cloudiq.local
  2. Below are the Domain members (Computers) joined in DC
    • CIQ-2012R2-DEV
    • CIQSQL2012
    • CIQ-WIN2016-DKR
    • cloud-2016
  3. SQL server installed on CIQSQL2012. This will be used for GMSA testing.
    • OS – Windows 2012
  4. cloud-2016 will be used to test GSMA connection.
    • This is the container host we are using to connect on premise SQL server using GMSA account.

  5. The GMSA account name is “container_gsma”. We will create this and configure it.
Step 1: Create the KDS Root Key
  1. We can generate this only once per domain.
  2. This is used by the KDS service on DCs (along with other information) to generate passwords.
  3. Login to domain controller.
  4. Open PowerShell and execute the below.
                            Import-module ActiveDirectory
        Add-KdsRootKey –EffectiveTime ((get-date).addhours(-10));5.
         

  5. Verify your key using the below command.
            Get-KdsRootKey
         
Step 2: Create GMSA account
  1. Create GSMA account using the below command.
            
        New-ADServiceAccount -Name container_gmsa -DNSHostName cloudiq.local 
        -PrincipalsAllowedToRetrieveManagedPassword "Domain Controllers", "domain admins", 
        "CN=Container Hosts,CN=Builtin, DC=cloudiq, DC=local" -KerberosEncryptionType RC4, AES128, AES256
         

  2. Use below command to verify the created GMSA account.
            Get-ADServiceAccount -Identity container_gmsa 
  3. If everything works as expected, you’ll notice a new gMSA object in your domain’s Managed Service Account.
Step 3: Add GMSA account to Servers where we are going to use.
  1. Open the Active directory Admin Center.
  2. Select the container_gmsa account and click on properties.
  3. Select the security and click on add.
  4. Select only Computers
  5. Select Computers you want to use GMSA. In our case we need to add CIQSQL2012 and cloud-2016.
  6. Reboot Domain controller first to these changes take effect.
  7. Reboot the computers who will be using GMSA. In our case we need to reboot CIQSQL2012 and cloud-2016.
  8. After reboots, login to Domain controller. Execute the below command.
            
        Set-ADServiceAccount -Identity container_gmsa -PrincipalsAllowedToRetrieveManagedPassword 
        CloudIQDC1$,cloud-2016$, CIQSQL2012$
         

Step 4: Install GMSA Account on Servers
  1. Login to the system where the GMSA account which will use it. In our case login to cloud-2016. This is the container host we are using to connect on premise SQL server using GMSA account.
  2. Execute the below command if AD features are not available.
            
        Enable-WindowsOptionalFeature -FeatureName ActiveDirectory-Powershell -online -all
         
  3. Execute the below commands
            Get-ADServiceAccount -Identity container_gmsa
        Install-ADServiceAccount -Identity container_gmsa
        Test-AdServiceAccount -Identity container_gmsa 

  4. If everything is working as expected then you need to create credential spec file which need passed to docker during container creation to utilize this service account. Run the below commands to downloads module which will create this file from Microsoft github account and will create a JSON file containing required data.
            
        Invoke-WebRequest "https://raw.githubusercontent.com/Microsoft/Virtualization-Documentation/live/windows-server-container-tools/ServiceAccounts/CredentialSpec.psm1" 
        -UseBasicParsing -OutFile $env:TEMP\cred.psm1
        Import-Module $env:temp\cred.psm1
        New-CredentialSpec -Name Gmsa -AccountName container_gmsa
        #This will return location and name of JSON file
        Get-CredentialSpec 

Step 5: SQL Server Configuration to allow GMSA
  1. On SQL server create login for GMSA account and add it to “Sysadmin” role. Based on your on premise DB access, you can add suitable roles.
            CREATE LOGIN [cloudiq\container_gmsa$] FROM WINDOWS
        sp_addsrvRolemember "cloudiq\container_gmsa$", "sysadmin" 

Image2Docker is a PowerShell module which ports existing Windows application workloads to Docker. It supports multiple application types, but the initial focus is on IIS and ASP.NET apps. You can use Image2Docker to extract ASP.NET websites from a VM – or from the local machine or a remote machine. Then so you can run your existing apps in Docker containers on Windows, with no application changes.

Image2Docker also supports Windows Server 2012, with support for 2008 and 2003 on its way. The websites on this VM are a mixture of technologies – ASP.NET WebForms, ASP.NET MVC, ASP.NET WebApi, together with a static HTML website.

To learn more about Image2Docker, please visit the following link

https://github.com/docker/communitytools-image2docker-win

Microsoft Windows 10 and Windows Server 2016 introduced new capabilities for containerizing applications.There are two types of container formats supported on the Microsoft Windows platform:

  • Hyper-V Containers – Containers with a dedicated kernel and stronger isolation from other containers
  • Windows Server Containers – application isolation using process and namespace isolation, and a shared kernel with the container host

Prerequisite
  • PowerShell 5.0 needs to be installed to use Image2Docker.

      Download URL: https://www.microsoft.com/en-us/download/details.aspx?id=50395

  • Image2Docker generates a Dockerfile which you can build into a Docker image. The system running the ConvertTo-Dockerfile command does not need Docker installed, but you will need Docker setup on Windows to build images and run containers.

Installation
  • Open PowerShell with administrative privileges. Run the following commands
     
                    
                    Install-Module Image2Docker
                    Import-Module Image2Docker
                     
  • You can validate the presence of the Install-Module command by running: Get-Command -Module PowerShellGet -Name Install-Module. If the PowerShellGet module or the Install-Module commands are not accessible, you may not be running a supported version of PowerShell. Make sure that you are running PowerShell 5.0 or later on a given machine.

Usage
  • Image2Docker can inspect web servers and extract a Dockerfile containing some or all of the websites configured on the server. ASP.NET is supported, and the generated Dockerfile will be correctly set up to run .NET 2.0, 3.5 or 4.x sites.
  • Image2Docker Supports the following source types.
    • Local Machines
    • Remote Path
    • Disk Images

The following commands show how to setup and run Image2Docker on local machines. Instructions on how to run it on remote path and disk images will be covered in future blog posts.

Local Machines
  • This mode looking for the IIS installed on the local machine and convert the IIS sites /virtual directories/ applications to docker files associate artifacts.
  • Run the following command
     
                    
                     ConvertTo-Dockerfile `
                     -Local `
                     -OutputPath {{OutputPath}} `
                     -Artifact IIS  `	
                     -Verbose
                     
  • Local parameter used for iis discovery on local machines.
  • OutputPath parameter specifying the location to store the generated Dockerfile and associated artifacts.
  • Artifact parameter specifies what artifact to inspect. In our case this is IIS.
  • Verbose parameter is optional and it will give all the verbose logs.
  • Following is the sample command
     
                    
                    ConvertTo-Dockerfile -Local -OutputPath c:\docker_repo\iis -Artifact IIS -Verbose
                     

This is a continuation of the previous posts that covered how to setup and run Image2Docker.

Docker Installation Status
  • Open PowerShell command and execute the following command.
  • docker info
  • Docker is already installed in the system If the command returns something like the below.

  • The docker is not installed in the machine if you see the error like below


Install Docker if not exists
  • Please follow the instructions below if docker is not installed in your machine.
  • Install the Docker-Microsoft PackageManagement Provider from the PowerShell Gallery.
    Install-Module -Name DockerMsftProvider -Repository PSGallery -Force
  • Next, you use the PackageManagement PowerShell module to install the latest version of Docker.
    Install-Package -Name docker -ProviderName DockerMsftProvider
  • When PowerShell asks you whether to trust the package source ‘DockerDefault’, type A to continue the installation. When the installation is complete, reboot the computer.
    Restart-Computer -Force
        Tip: If you want to update Docker later:
        Check the installed version with
     
                    Get-Package -Name Docker -ProviderName DockerMsftProvider 

    Find the current version with    

     
                    Find-Package -Name Docker -ProviderName DockerMsftProvider 

    When you’re ready, upgrade with

     
                    Install-Package -Name Docker -ProviderName DockerMsftProvider -Update -Force 
     
                    Start-Service Docker 
  • Ensure your Windows Server system is up-to-date by running. Run the following command.
     
                    Sconfig 
    • This shows a text-based configuration menu, where you can choose option 6 to Download and Install Updates.
       
                      
                      ===============================================================================
                                               Server Configuration
                      ===============================================================================
                      
                      1) Domain/Workgroup:                    Workgroup:  WORKGROUP
                      2) Computer Name:                       WIN-HEFDK4V68M5
                      3) Add Local Administrator
                      4) Configure Remote Management          Enabled
                      
                      5) Windows Update Settings:             DownloadOnly
                      6) Download and Install Updates
                      7) Remote Desktop:                      Disabled
                      ...
                       
    •  When prompted, choose option A to download all updates.
Create Containers from Imag2Docker Dockerfile.
  • Make sure that docker installed on your Windows 2016 or Windows 10 with Anniversary updates.
  • To build that Dockerfile into an image, run:
     
                    docker build -t img2docker/aspnetwebsites. 
  • Here img2docker/aspnetwebsites is the name of the image. You can give your own name based on your needs.
  • When the build completes, we can run a container to start my ASP.NET sites.
  • This command runs a container in the background, exposes the app port, and stores the ID of the container.
     
                    $id = docker run -d -p 81:80 img2docker/aspnetwebsites 

    Here 81 is the host port number and 80 is the container port number.

  • When the site starts, we will see in the container logs that the IIS Service (W3SVC) is running:
     
                    docker logs $id 

    The Service ‘W3SVC’ is in the ‘Running’ state.

  • Now you can browse to the site running in IIS in the container, but because published ports on Windows containers don’t do loopback yet, if you’re on the machine running the Docker container, you need to use the container’s IP address:
     
                    $ip = docker inspect --format '{{ .NetworkSettings.Networks.nat.IPAddress }}' 
     
                    $id 
     
                    start http://$($ip) 

That will launch your browser and you’ll see your ASP.NET Web application running in IIS, in Windows Server Core, in a Docker container.

This is a continuation of the previous blog post on GMSA setup.

Step 1: Create Docker Image
  1. I have created ASPNET MVC app and it accessing the SQL server using windows authentication.
  2. My Connection string looks like below.
     
                    
                    <connectionStrings>
                    <add name="AdventureWorks2012Entities"
                    connectionString="metadata=res://*/ManagerEmployeeModel.csdl|res://*/ManagerEmployee
                    Model.ssdl|res://*/ManagerEmployeeModel.msl;provider=System.Data.SqlClient;provider 
                    connection string=&quot;data source=CIQSQL2012;initial
                    catalog=AdventureWorks2012;integrated
                    security=True;MultipleActiveResultSets=True;App=EntityFramework&quot;"
                    providerName="System.Data.EntityClient" />
                    </connectionStrings>
                     
  3. I have created the Docker file and necessary build folders using image2docker. Refer Image2Docker
  4. Docker file looks like below
     
                    
                    # escape=` 
                    FROM microsoft/aspnet:3.5-windowsservercore-10.0.14393.1066 
                    SHELL ["powershell", "-Command", "$ErrorActionPreference = 'Stop'; 
                    $ProgressPreference = 'SilentlyContinue';"] 
                     
                    # disable DNS cache so container addresses always fetched from Docker 
                    RUN Set-ItemProperty -path 'HKLM:\SYSTEM\CurrentControlSet\Services\Dnscache\
                    Parameters' -Name ServerPriorityTimeLimit -Value 0 -Type DWord 
                     
                    RUN Remove-Website 'Default Web Site'; 
                     
                    RUN Enable-WindowsOptionalFeature -Online -FeatureName IIS-ApplicationDevelopment,
                    IIS-ASPNET,IIS-ASPNET45,IIS-CommonHttpFeatures,IIS-DefaultDocument,
                    IIS-DirectoryBrowsing,IIS-HealthAndDiagnostics,IIS-HttpCompressionStatic,
                    IIS-HttpErrors,IIS-HttpLogging,IIS-ISAPIExtensions,IIS-ISAPIFilter,
                    IIS-NetFxExtensibility,IIS-NetFxExtensibility45,IIS-Performance,IIS-RequestFiltering,
                    IIS-Security,IIS-StaticContent,IIS-WebServer,IIS-WebServerRole,NetFx4Extended-ASPNET45 
                     
                    # Set up website: MyGSMAMvc 
                    RUN New-Item -Path 'C:\inetpub\wwwroot\MyAspNetMVC_GSMA' -Type Directory -Force;  
                     
                    RUN New-Website -Name 'MyGSMAMvc' -PhysicalPath 'C:\inetpub\wwwroot\MyAspNetMVC_GSMA' -Port 80 -Force;  
                     
                    EXPOSE 80 
                     
                    COPY ["MyAspNetMVC_GSMA", "/inetpub/wwwroot/MyAspNetMVC_GSMA"] 
                     
                    RUN $path='C:\inetpub\wwwroot\MyAspNetMVC_GSMA'; ` 
                        $acl = Get-Acl $path; ` 
                        $newOwner = [System.Security.Principal.NTAccount]('BUILTIN\IIS_IUSRS'); ` 
                        $acl.SetOwner($newOwner); ` 
                        dir -r $path | Set-Acl -aclobject  $acl 
                    
                     
  5. Move the necessary files to cloud-2016.
  6. Login to the cloud-2016 server.
  7. Create the image using the below commands. Refer Docker commands.
     
                    
                    docker build -t myaspnetmvc/gmsa  
Step 2: Create Container
  1. when you are creating docker container you need to specify the additional configuration to utilize GMSA. Please execute below commands
     
                    
                    docker run -d --security-opt "credentialspec=file://Gmsa.json" myaspnetmvc/gmsa 
  2. Or execute the commands below
     
                     $id = docker run -d --security-opt "credentialspec=file://Gmsa.json" myaspnetmvc/gmsa docker logs $id
                    $ip = docker inspect --format '{{ .NetworkSettings.Networks.nat.IPAddress }}' $id start http://$($ip)
                     
  3. Browse the appropriate page, you can see DB records.
  4. You can test the Active directory communication below. 
    1. Login into running docker container using docker exec command and check if, in fact, you can communicate to Active Directory. Execute nltest /parentdomain to verify
       
                      docker exec -it 0974d72624eb powershell 
                      nltest /parentdomain 
                      cloudiq.local. (1) 
                      The command completed successfully
                        

CloudIQ is a leading Cloud Consulting and Solutions firm that helps businesses solve today’s problems and plan the enterprise of tomorrow by integrating intelligent cloud solutions. We help you leverage the technologies that make your people more productive, your infrastructure more intelligent, and your business more profitable. 

US

3520 NE Harrison Drive, Issaquah, WA, 98029

INDIA

Chennai One IT SEZ,

Module No:5-C, Phase ll, 2nd Floor, North Block, Pallavaram-Thoraipakkam 200 ft road, Thoraipakkam, Chennai – 600097


© 2023 CloudIQ Technologies. All rights reserved.

Get in touch

Please contact us using the form below

    USA

    3520 NE Harrison Drive, Issaquah, WA, 98029

    +1 (206) 203-4151

    INDIA

    Chennai One IT SEZ,

    Module No:5-C, Phase ll, 2nd Floor, North Block, Pallavaram-Thoraipakkam 200 ft road, Thoraipakkam, Chennai – 600097

    +91-044-43548317