Deploying a Pod containing three applications using Jenkins CI/CD pipeline and updating them selectively
A Kubernetes pod – incidentally, some say it is named after a whale pod because the docker logo is a whale – is the foundational unit of execution in a K8s ecosystem. While docker is the most common container runtime, pods are container agnostic and support other containers as well.
Simply put, a K8s pod is a layer of abstraction wrapped around containers to group them together to allocate resources and to manage them efficiently.
Continuous integration and delivery or CI/CD is a critical part of DevOps ecosystems, especially for cloud-native applications. DevOps teams frequently use Jenkins CI/CD pipelines to increase the speed and quality of collaborated software development ecosystems by adding automation. Thanks to Helm, deploying Jenkins server to K8s is quick and easy. The difficult bit is building the pipeline.
Here is a post that describes how to deploy a pod containing three applications using a Jenkins CI/CD pipeline and update them selectively.
Task on Hand:
Use a Jenkins pipeline to build a spring-boot application to generate jar file, dockerize the application to create a docker image, push the image to a docker repository and pull the image into the pod to create containers. The pod should contain 3 containers for the three applications, respectively. Upon git commit, only the container for which there is a change must be updated (rolling update).
Steps
- Create a pipeline using groovy script to clone the respective git repo, build the project using maven, build the docker images, push it to dockerhub and pull these images to run containers in the pod.
- Repeat the steps for all the three applications in separate stages. Make sure to create a separate directory in each stage to prevent conflicts when using similar files. Also, this clones the different git repos into different folders to avoid confusion.
- Here is the Jenkinsfile/Pipeline script to perform the above task:
pipeline {
agent any
stages {
stage('Build1'){
    steps{
        dir('app1'){
            script{
                git 'https://github.com/cloud/simple-spring.git'
                sh 'mvn clean install'
                app = docker.build("cloud007/simple-spring")
                docker.withRegistry( "https://registry.hub.docker.com", "dockerhub" ) {
                // dockerImage.push()
                app.push("latest")
            }
        }
    }
}

}
stage('Build2'){
    steps{
        dir('app2'){
            script{
                git 'https://github.com/cloud/simple-spring-2.git'
                sh 'mvn clean install'
                app = docker.build("cloud007/simple-spring-2")
                docker.withRegistry( "https://registry.hub.docker.com", "dockerhub" ) {
                // dockerImage.push()
                app.push("latest")
            }
        }
    }
}

}
stage('Build3'){
    steps{
        dir('app3'){
            script{
                git 'https://github.com/cloud/simple-spring-3.git'
                sh 'mvn clean install'
                app = docker.build("cloud007/simple-spring-3")
                docker.withRegistry( "https://registry.hub.docker.com", "dockerhub" ) {
                // dockerImage.push()
                app.push("latest")
            }
        }
    }
}
}
stage('Orchestrate')
{
    steps{
        script{
    sh 'kubectl apply -f demo.yaml'
        }
    }
}

}
}
4. Make sure to properly configure docker and expose the dockerd in port 4243 and then change permission to allow Jenkins to use docker commands by changing permission for the /var/run/docker.sock shown.
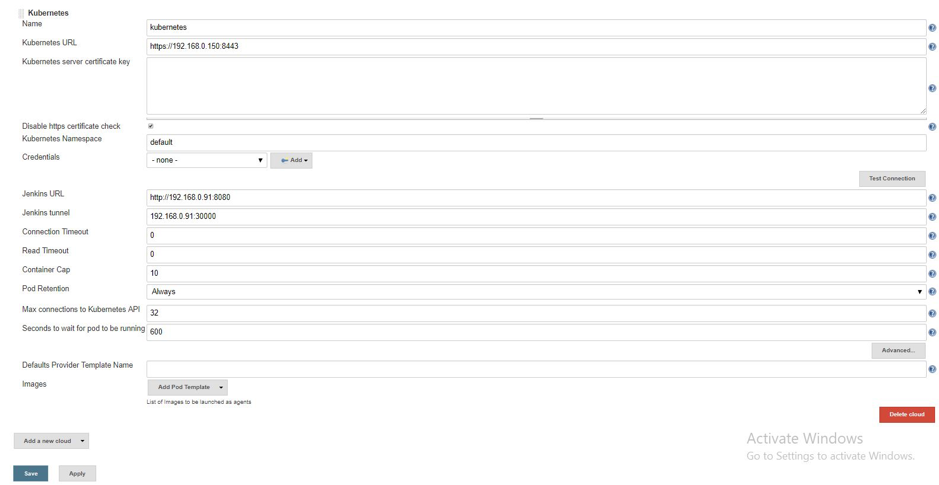
5. Coming to integrating Kubernetes with Jenkins, it can be done using two plugins:
- Kubernetes plugin: When using this plugin, we configure the credentials to use our local cluster/azure cluster and specify the container templates for the containers to be created in the pipeline. But since all the tasks must run in containers, it is a little confusing approach. A better approach would be to use the kuberentes-cli plugin.
Refer: https://github.com/jenkinsci/kubernetes-plugin
- Kubernetes-cli plugin: It provides a withconfig() for pipeline support, which uses the configure credentials to connect to our cluster and perform kubectl commands. However when running the pipeline, the kubeconfig wasn’t recognized for some reason, and kept giving the error ‘file not found’.
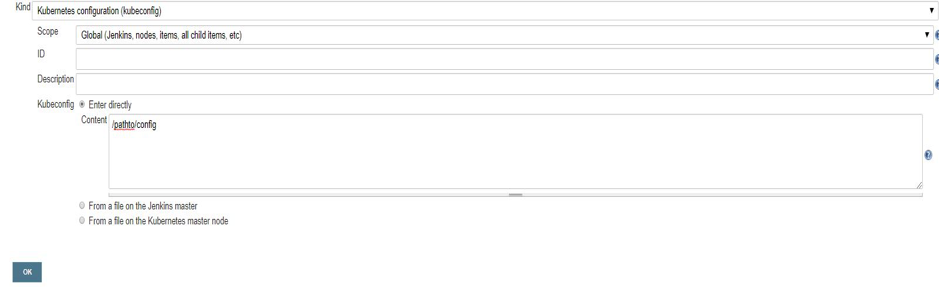
Refer: https://github.com/jenkinsci/kubernetes-cli-plugin/blob/master/README.md
Hence, we installed kubectl on the Jenkins host, configured the cluster manually, and ran shell commands from the Jenkins pipeline, where Jenkins was recognized as an anonymous user and was only granted get access but couldn’t create pods/deployments.
Here are some common problems faced during this process and the troubleshooting procedure.
- Configuring Jenkins to use local minikube cluster:
We had trouble using both the plugins to properly configure Jenkins to create deployments as required. Using shell commands to run kubectl was also not successful since Jenkins was recognized as an anonymous user, and authorization prevented anonymous users from creating deployments. - Permission for /var/run/docker.sock is reset to root after every restart, so make sure to change it to allow Jenkins to continue to use docker commands: choose Jenkins /var/run/docker.sock
- Installing Minikube:
i) Started minikube cluster using hyperv as the driver and created a virtual switch:
minikube start –vm-driver=hyperv –hyperv-virtual-switch=”Primary Virtual Switch”
ii) Installation takes a lot of time, so we have to wait patiently, and eventually, the cluster will get configured and started. If there is a problem with apiserver, then stop the machine after SSHing into minikube vm:
minikube ssh
sudo poweroff
iii) Then start minikube the same way.
Here are some suggested best practices
Maintaing git repo:
- Branching must be used while updating the source code or adding a particular file to the repository. Suppose you want to add a readme, then create a new branch from master, create the readme and commit it and then merge the branch with the origin.
- Similarly, for adding some test files/changing source code – create a new branch for testing/modification, update and commit the code and merge with the master when finished. The purpose of this is to allow easy roll back to the original master if you run into some errors when working with the new files and to prevent any conflict in code with the master.
- Commit only after you have tested the code properly, never commit incomplete code.
- Write good commit messages to keep track of the changes you have made.
Versioning:
- Follow the versioning convention X.Y.Z where X is incremented for a new major update/feature, Y is incremented for minor updates/minor features and Z for minor patches/bug fixes
- Avoid version lock that has too many dependencies in a single version. In such a scenario the package can only be updated after releasing new versions for every dependent package.
Docker repo:
- Use unique tags for deployment/pushing images to the repository.
- Always use stable tags for building images but never deploy/pull images using stable tags. Stable tags are the ones that do not roll over the updates to future versions but are bound to the current version (tag).
Share this:
CloudIQ is a leading Cloud Consulting and Solutions firm that helps businesses solve today’s problems and plan the enterprise of tomorrow by integrating intelligent cloud solutions. We help you leverage the technologies that make your people more productive, your infrastructure more intelligent, and your business more profitable.
LATEST THINKING
INDIA
Chennai One IT SEZ,
Module No:5-C, Phase ll, 2nd Floor, North Block, Pallavaram-Thoraipakkam 200 ft road, Thoraipakkam, Chennai – 600097
© 2023 CloudIQ Technologies. All rights reserved.